Setting up a Connection Between a USB Receiver and a Wireless Keyboard.

Example is a Microsoft Wireless Laser Keyboard 6000 V2.0

Receiver  

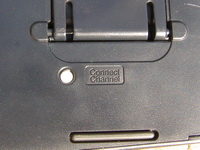
Method: Press the button on the radio receiver to get the green lights scanning – while they are scanning press the ‘Connect’ button on the bottom of the keyboard or mouse. You may have to press it a few times but keep your eye on the receiver scanning lights. When the receiver sees the remote device the scanning instantly stops indicating that it has seen the remote device (keyboard or mouse). The device should now work.

While pressing the buttons is mentioned in the little book that comes with your Keyboard / Mouse Combo also various web sites none of them mention the sequence of the operation. You can push buttons as much as you like but it will not work until you do it in the correct sequence.

Other keyboards / mice with a USB Receiver may use a similar method. More recent Wireless Mouse / Keyboards do not have a scanning receiver as the devices are locked together so no setup is required.

Button   Keyboard
Label   Pictures on the left show - top to botton - the Receiver, the Connect Button on the Keyboard and the Label on the Keyboard.
I am writing this web page after a very frustrating morning trying to get a 6000 keyboard to work and another 6000 that had stopped working while I was trying to get the first one to work. Buttons were pressed, scans done over and over again with nothing happening. I thought the keyboards were dead. However, it was not until a flash of inspiration (on a bus) made me try the sequence described above. Soon as I 'twigged it' I had all my keyboards going again. The Receivers / Keyboards and Mice are interchangable but need setting up if they do not work. Also, just for information, 'foreign' keyboards usually are standard Qwerty (Western) keyboards with extra 'foreign' letters engraved on the keys.

Back to the Index Page